Still being a student while planning a wedding has its advantages. Despite the time constraints, graduate art classes allow for more freedom in final projects as we typically get to decide what direction we want to pursue. Graduate Printmaking was no exception! Throughout this semester, I was taught printmaking techniques such as: Suminagashi (paper marbling), relief printing, intaglio printing and screen printing. For our final, we were tasked with choosing a technique to pursue in greater depth while creating a multi-piece body of work. With my wedding planning in full swing it felt fitting that I create and print my wedding invitations by hand as my final project. Here is my process:
THE PROPOSAL
For the final project, I will be making my personal wedding invitation suite! This will consist of the wedding invitation itself (4.25x5.5), RSVP card (3x5), and wax seal (1in round). The process will entail laser cutting each block with the chosen design and then relief printing on high quality cotton paper. The design will feature hand-drawn elements using Procreate in addition to the necessary text in a simple font for ease of cutting and clean printing. After creating the final design in Illustrator, the design will be laser cut into a block of sapele wood and then printed on cotton paper. The wax seal will be designed based off of the illustrations or as a monogram and will then be outsourced for carving.
The end product will be a packaged wedding invitation including: invitation, RSVP, and an envelope with wax seal.
MATERIALS:
- 4.25 x 5.5 sapele wood block
- 3 x 5 sapele wood block
- Wax stamp (ARTISAIRE)
- Champagne Gold Wax Beads
- Sealing Wax Warmer Kit
- Gamblin Relief Ink (Phthalo Blue, White, and Black)
- Rives BFK White 280 gsm paper
- Dusty Blue Envelopes (A2 and RSVP)
THE PROCESS
As with any art project, I started with a mood board and some sketches to really feel out what design style I wanted the invitations to take on. After some research and thinking about the sale of our wedding, I went with a simple, right-justified layout for the text with a rose and eucalyptus doodle.
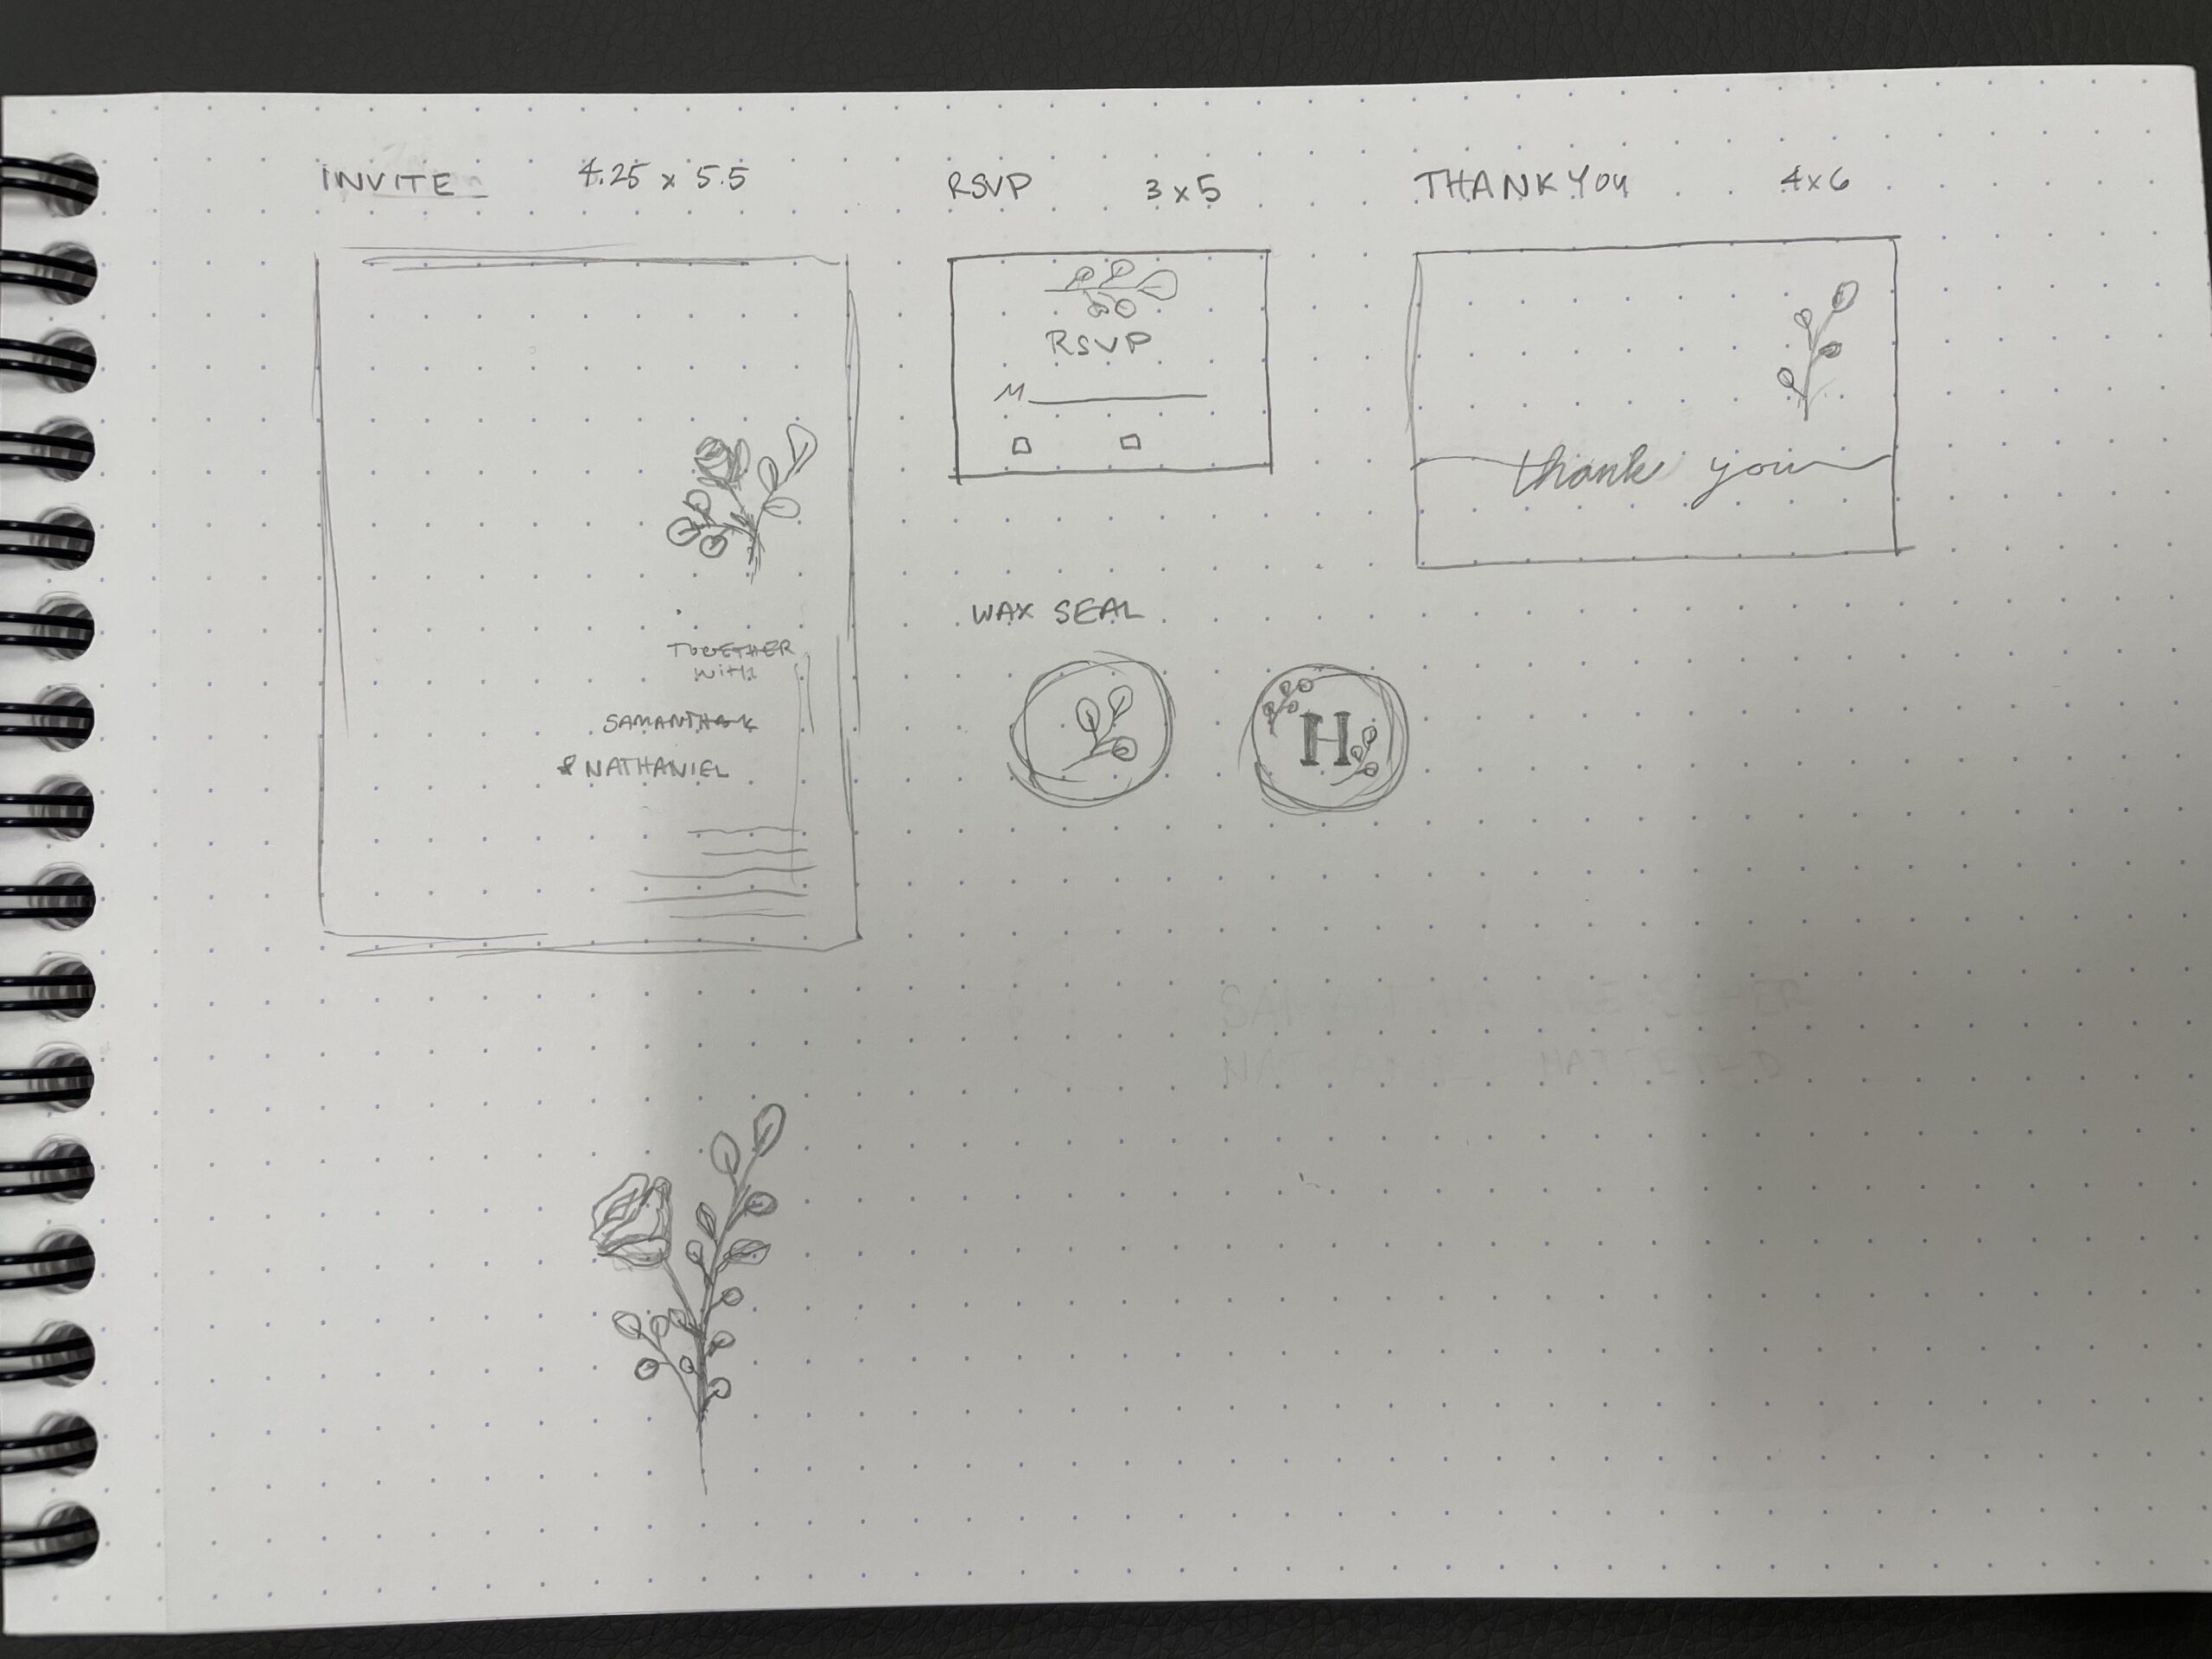
After a lot of sketching and research, the next step was to create digital versions of all the designs so that they could be laser engraved into the wood blocks. Using Adobe Illustrator, I sized the artboards for each piece, entered the text in a simple sans-serif font, and chose a final layout. Using Procreate, I drew a rose and a eucalyptus stem (to match my bouquet) and turned them into vectors using Illustrator. After some mild tweaking, I got the doodles to the finalized state you see below.
Following the finalization of the digital files, my gracious professor helped me get the documents ready to cut and allowed me to use her Glowforge to laser cut my design into the wood blocks. Meanwhile, my wax seal had to be laser cut by professionals using the vector I created and would be shipped directly to me.
THE PRINTING
When relief printing with wood blocks, you need to start the printing process by sealing the wood. So, I used a simple shellack and let it dry for about twenty minutes. In the meantime, I had to start gathering materials and preparing my paper to be printed. As mentioned before, I purchased Rives BFK White 280 gsm paper in a 22 x 30 format which needed to be sized down for the invitations and RSVPs. In addition to properly sizing my paper, I had to mix my own ink color to match our slate blue envelopes - using a balance of phthalo blue, white and black. After collecting all of my supplies, the printing press had to be properly calibrated for the wood blocks and my specific paper thickness. Then the printing could begin!
After some prints were created, I realized a few spots of wood that were not cut deep enough so I went in and carved by hand. I did this a few times throughout the process because of the volume of prints that I was making. When carving by hand, I used a bench hook to get a good amount of leverage and had to be super precise so as not to ruin the words.
TIPS + TRICKS
- With detailed blocks such as invitations, it is much easier to print on a press rather than by hand
- Place wood buffers around the print blocks to avoid shifting
- When figuring out the height to set the press, try it a few different ways before troubleshooting with all your good paper. Starting out, I noticed that my smaller cut paper would shift in the press and I was getting double prints that I didn't know how to fix. By adding some paper towels on top of the paper and lowering the press just a touch, I was able to increase the pressure enough to get a great print.
- To get a cleaner print every time, use a frisket to make sure that only the intended content is printed
- Colored ink can be preserved and reused, but make sure the consistency stays thin enough - the oil based ink that I was using had a stickier consistency
IMG_1570
IMG_1571
IMG_1640 copy
IMG_1641 copy
IMG_1642 copy
IMG_1648 copy
IMG_1647 copy
IMG_1651 copy
IMG_1645 copy
IMG_1649 copy
IMG_1644 copy
IMG_1650 copy
THE WAX SEAL
Wax seals are such a fancy touch to add to invitations and thank you notes. Since the stamp is made out of durable and long lasting brass, it made sense to get this professionally printed so I can enjoy using it for years to come! As far as the design goes, we wanted a hand drawn element to match the rest of our invitation suite. To make that happen, I took the leaves from our invitation and manipulated them to be curved, accommodating to the round edge of the stamp. In addition, I added "H" in the same font from the invitation so that the wax seal could be used as a monogram in the future!
TIPS + TRICKS
- I HIGHLY recommend getting wax stamps professionally cut - this was so much easier and less expensive than trying to learn how to perfectly cut into brass
- When stamping, put the wax stamp on ice until the wax is ready so that the seal won't stick as easy
- Wipe the stamp off before adding it to the wax to avoid random imperfections
FINAL PRODUCT
After plenty of time in the MFA studio, I got about 20 good prints out of the blocks before my friskets needed replacing. At that point, I called it a day and finalized three perfected prints to package with sealed envelopes. Overall, I am really happy with how the invitations turned out and I cannot wait to send them to people and post the actual invitations after the wedding! This was a very fun project and with the right equipment, I could see myself doing this in the future.